
Knowing how to prune roses is all about the timing and technique, and it’s essential for keeping them lush and blooming brightly. Do you have some rose bushes that are looking a little unkempt, or perhaps you’re considering adding some new roses into your landscape? Take a look at this guide to pruning roses in Florida so you can keep them looking their best.
Proper Tools and Protection for Pruning Roses
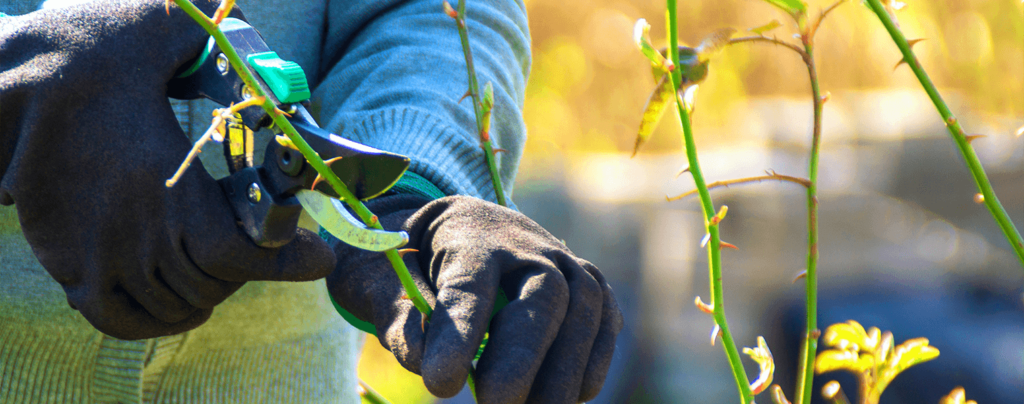
Before you get started on pruning rose bushes, you need to make sure you’ve got the proper equipment. You don’t want to end up accidentally injuring your plant from using the wrong kind of shears, and you also don’t want to injure yourself on those pointy thorns! Gather the following tools and protective gear to make pruning a painless task!
- Bypass shears: These clippers have blades that overlap, resulting in a clean cut that doesn’t crush the branch. Anvil shears have blades that meet, which can often result in crushed stems, which can really hurt your plant.
- Protective gloves: A good pair of thick gardening gloves are important so you can reach in and maneuver branches without getting pricked by thorns.
- Thick, long sleeves: Make sure no skin is exposed on your arms while pruning, and wear thick layers so the thorns can’t poke through the material.

What is the Best Time to Prune Roses?
Most gardening tutorials will instruct you to prune your roses after the last frost of spring, but since frost isn’t something we regularly encounter in Fort Lauderdale, many of us are left scratching our heads! When you’re pruning in SoFlo, our tropical climate has much less of a drastic temperature shift from season to season, so the best time to prune roses is in February, just before our plants wake up from winter dormancy.
Ideally, a rose bush should have a shape kind of like a vase—open in the center, with upright branches all around.
When your roses are blooming in summer, you’ll want to regularly deadhead the spent blooms to encourage continuous growth. Later in fall and winter, your roses will bear rose hips, which are tiny fruits. In Florida, it’s important to leave rosehips on your plant over the winter because it helps signal to your plant that it’s time for dormancy. We don’t have the temperature shift like colder climates, so our roses need the extra nudge to let them know it’s time to rest.
How to Prune Roses in 6 Steps
This simple, foolproof guide to trimming rose bushes will take you through each step one at a time, so you don’t miss anything or make any major blunders. Remember, roses are vigorous growers and can handle major pruning, so while you’ll want to avoid going overboard, don’t be afraid to do a thorough trim and cleanup.
Step One: Remove Any Leaves
If there are any old leaves from last year left fluttering on your rose bushes, take them all off and dispose of them, so you have a clear view of the branches of your plant.
Step Two: Cut Off Dead Branches and Weak Growth
You can tell if rose wood is dead by cutting into it. If it’s brown, it’s dead, and if it’s green, it’s still healthy and growing! Nip off all the brown stuff first because damaged plant material can actually drain significant energy from plants during their growing season. Any weak, thin branches that are smaller than the width of a pencil can be removed as well.
Step Three: Remove Crossing Branches and Open the Center
Ideally, a rose bush should have a shape kind of like a vase—open in the center, with upright branches all around. Cutting out branches that go crosswise or rub against other branches is important, as this helps to prevent diseases and pests.
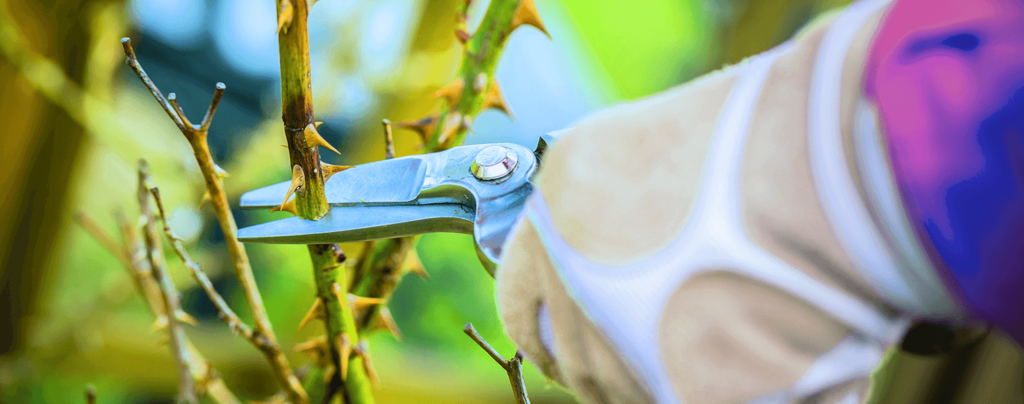
Step Four: Prune the Rest of the Branches
This is where it gets a little trickier, and you’ll want to use careful technique. The rose bush branches will have bumps on them where the leaf would meet the stem—these are called bud eyes! New stems will grow in the direction of the bud eye, and the goal is to encourage the branches to grow outward, not inward.
By this logic, you’ll want to trim the branches ¼ – ½ inch above an outward-facing bud eye. Make the cuts at a 45° angle sloping away from the bud to encourage water to run off the other side. This will help your roses to keep growing in that perfect vase shape.
Step Five: Seal Cuts
While many landscape plants can be pruned without a second thought, roses can be a bit more prone to diseases, so it’s good to take preventative measures to keep them protected. Applying a pruning sealer to the cut ends of the branches will work almost like a liquid bandaid to protect the cuts as they heal up.
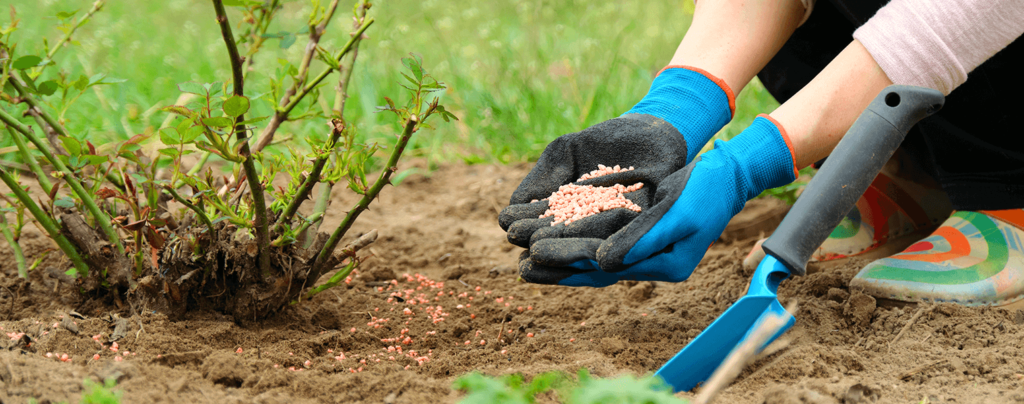
Step Six: Feed Your Plants
With their fresh trim all completed, your roses will be ready to come out of their winter dormancy and get ready to start blooming. To give them a much-needed boost to help keep them sustained through their vigorous growing season, add some fertilizer that will continually deposit nutrients into the soil, such as fertilizer spikes. Roses are very greedy eaters, so to get the best growth results, you’ll want to make sure they’re well fed!
Remember to always clean up all the leftover trimmings and old plant material after pruning, as this piled-up debris can attract pests and diseases. If any of the plant material is diseased, toss it away safely in the garbage, not the compost bin, or else the disease could infect your other plants. However, if the plant material is healthy, feel free to toss it in the compost!
Are you eager to add some of these luxurious, romantic blooms into your landscape? Living Color has so many stunning varieties to choose from. These beauties are sure to be the standout stars of your garden! Visit us at the garden center to see the full collection, and don’t hesitate to ask our experts if you have any questions about planting or general rose care.